
Developing Layers Using Watercolour Inks
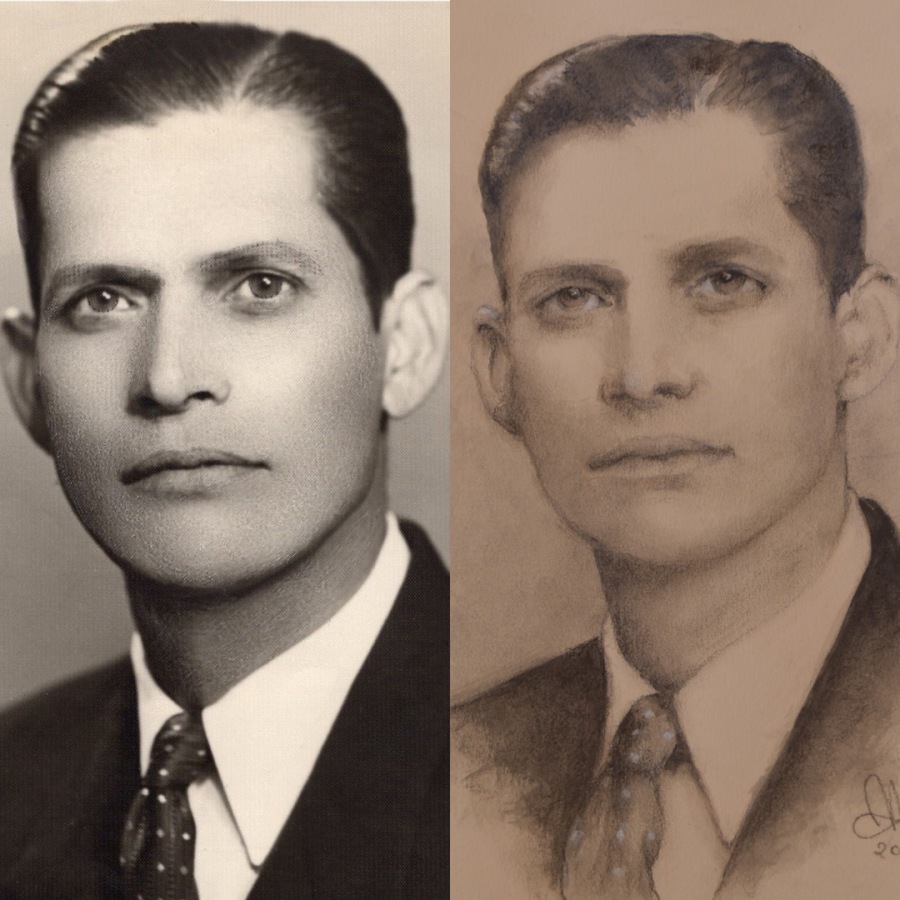
It was with particular pleasure that I was asked by my life long friend, John, to produce a monochrome painting of both his parents from a very old black and white portrait photograph. I felt very flattered and honoured that I should be asked to produce something which I know would only be appreciated by John if he thought it was any good. Which was also a bit daunting to be honest because knowing John he'd never reject the work even if it wasn't really any good. The images he gave me were excellent quality and was much easier to work with as a result.
Photographs are virtually 100% accurate. In that they reflect exectly what was captured by the lens and transferred to film, then to paper. The problem with photographs is that they tend to lack depth, dimension...soul even in many cases. Paintings can bring those things out much better than photographs tend to do. Incidentally, I'm not saying that photigraphs cannot convey depths this way before I receive a litany of corrections! LOL... I'm just saying that the painted work tends to express more than normal photographic images do.
So, back to John's Dad...
So, I set about the work I was asked to do. Artists can adopt a number of strategies when underatking a painting of this sort. Principally though you can either go 'bold' and paint the values as you see them or build them up in layers. I adopted the latter...it's much easier. I'm simply not that good to go bold.
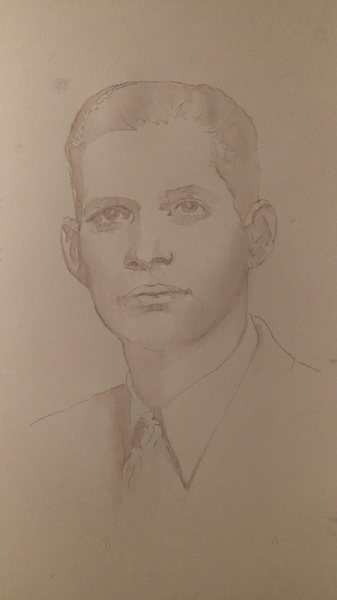
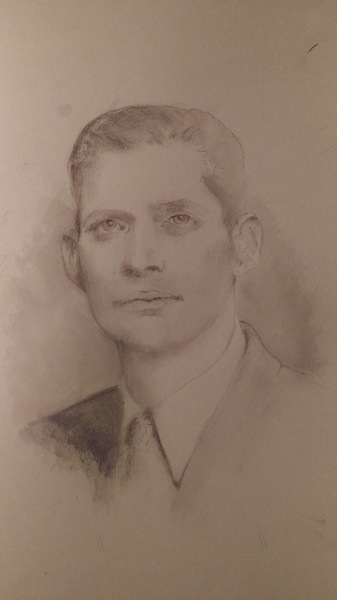
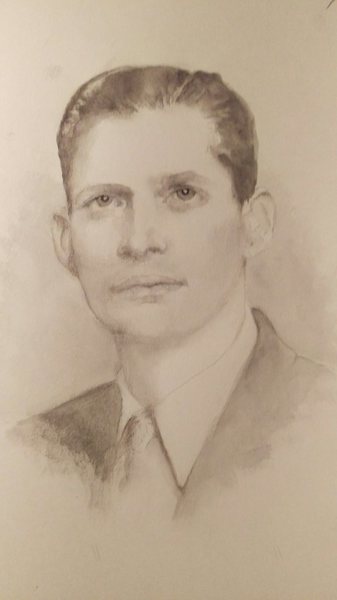
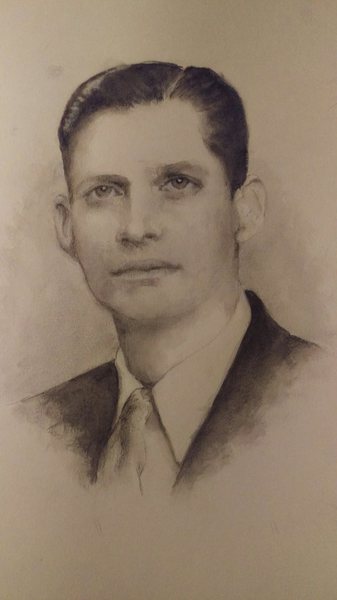

Image #1
Contains the basic outlines and is given a light wash. I'm using only one ink for this work, the Sepia. I can work out and establish the main tonal areas of light and dark. If I've made a mistake I can either lift it off or leave it. It's so light at this stage that when we progress to the darker layers, any residual layesr at this stage will not interfere.
Image #2
I've increased the tonal values in the main dark areas; the suit, hair and shadows. At this stage, it's important to get the pupils right. With this layer whuich has a little more dark value compared to Layer #1, you will see whether you're on the right track. The eyes, in this case, are looking slightly above the camera lens. It's a key feature of the composition and is important to make sure we get this secured. So once you've darkened the pupils, leave the painting and come back to it a little later. You'll see if the trajectory of sight is right or not. I was lucky, in this case, it looked OK to me so I carried on with building the rest of the elements up.
Image #3
Less dilution again and increased dark values therefore. He's wearing a dark suit, so it's safe to pick that area first to make sure your layers are building up in equal measure. Remember too that the relatively dramatic area where the light reflects off his hair must be worked round. You cannot easily resolve this later as you might with oils. Watercolours are based on negative spaces which means you leave the brightest areas with the least paint.
Image #4
By this point, the contrast betwen his shirt and the tones on his chin and neck area must be established. Building the subtle tones can be quite tricky at this point. You don't want to go too heavy nor do you want to go too expansive (ie cover areas which don't need it). I found using a little charcoal on my finger and smudging it gives a great effect that I could control very easily. There's such a thing as a 'pouce', French I think. It's a small soft based ball of sponge wrapped in a small pice of stocking (it's OK, Megan said I could use one of her disgarded ones) tied up to hold it secure. You dip the rounded end in some powdered charcoal (which I made up myself from some broken pieces that my favourite art shop was selling cheap as they were broken) and gently smudge it in the areas that need that gentle and gradual toned effect.
Image #5
The work is done, or virtually done. Any adjustments can be done using a chacoal pencil or watercolour ink using a fine brush.
Voila! Have a go...
